Bonjour! Bonjourno!
Even though I’m still in Paris, I couldn’t let National Pizza Day – it’s tomorrow – go by without a salute from afar. And a hat-tip to my in-house pizzaiolo, Michael.
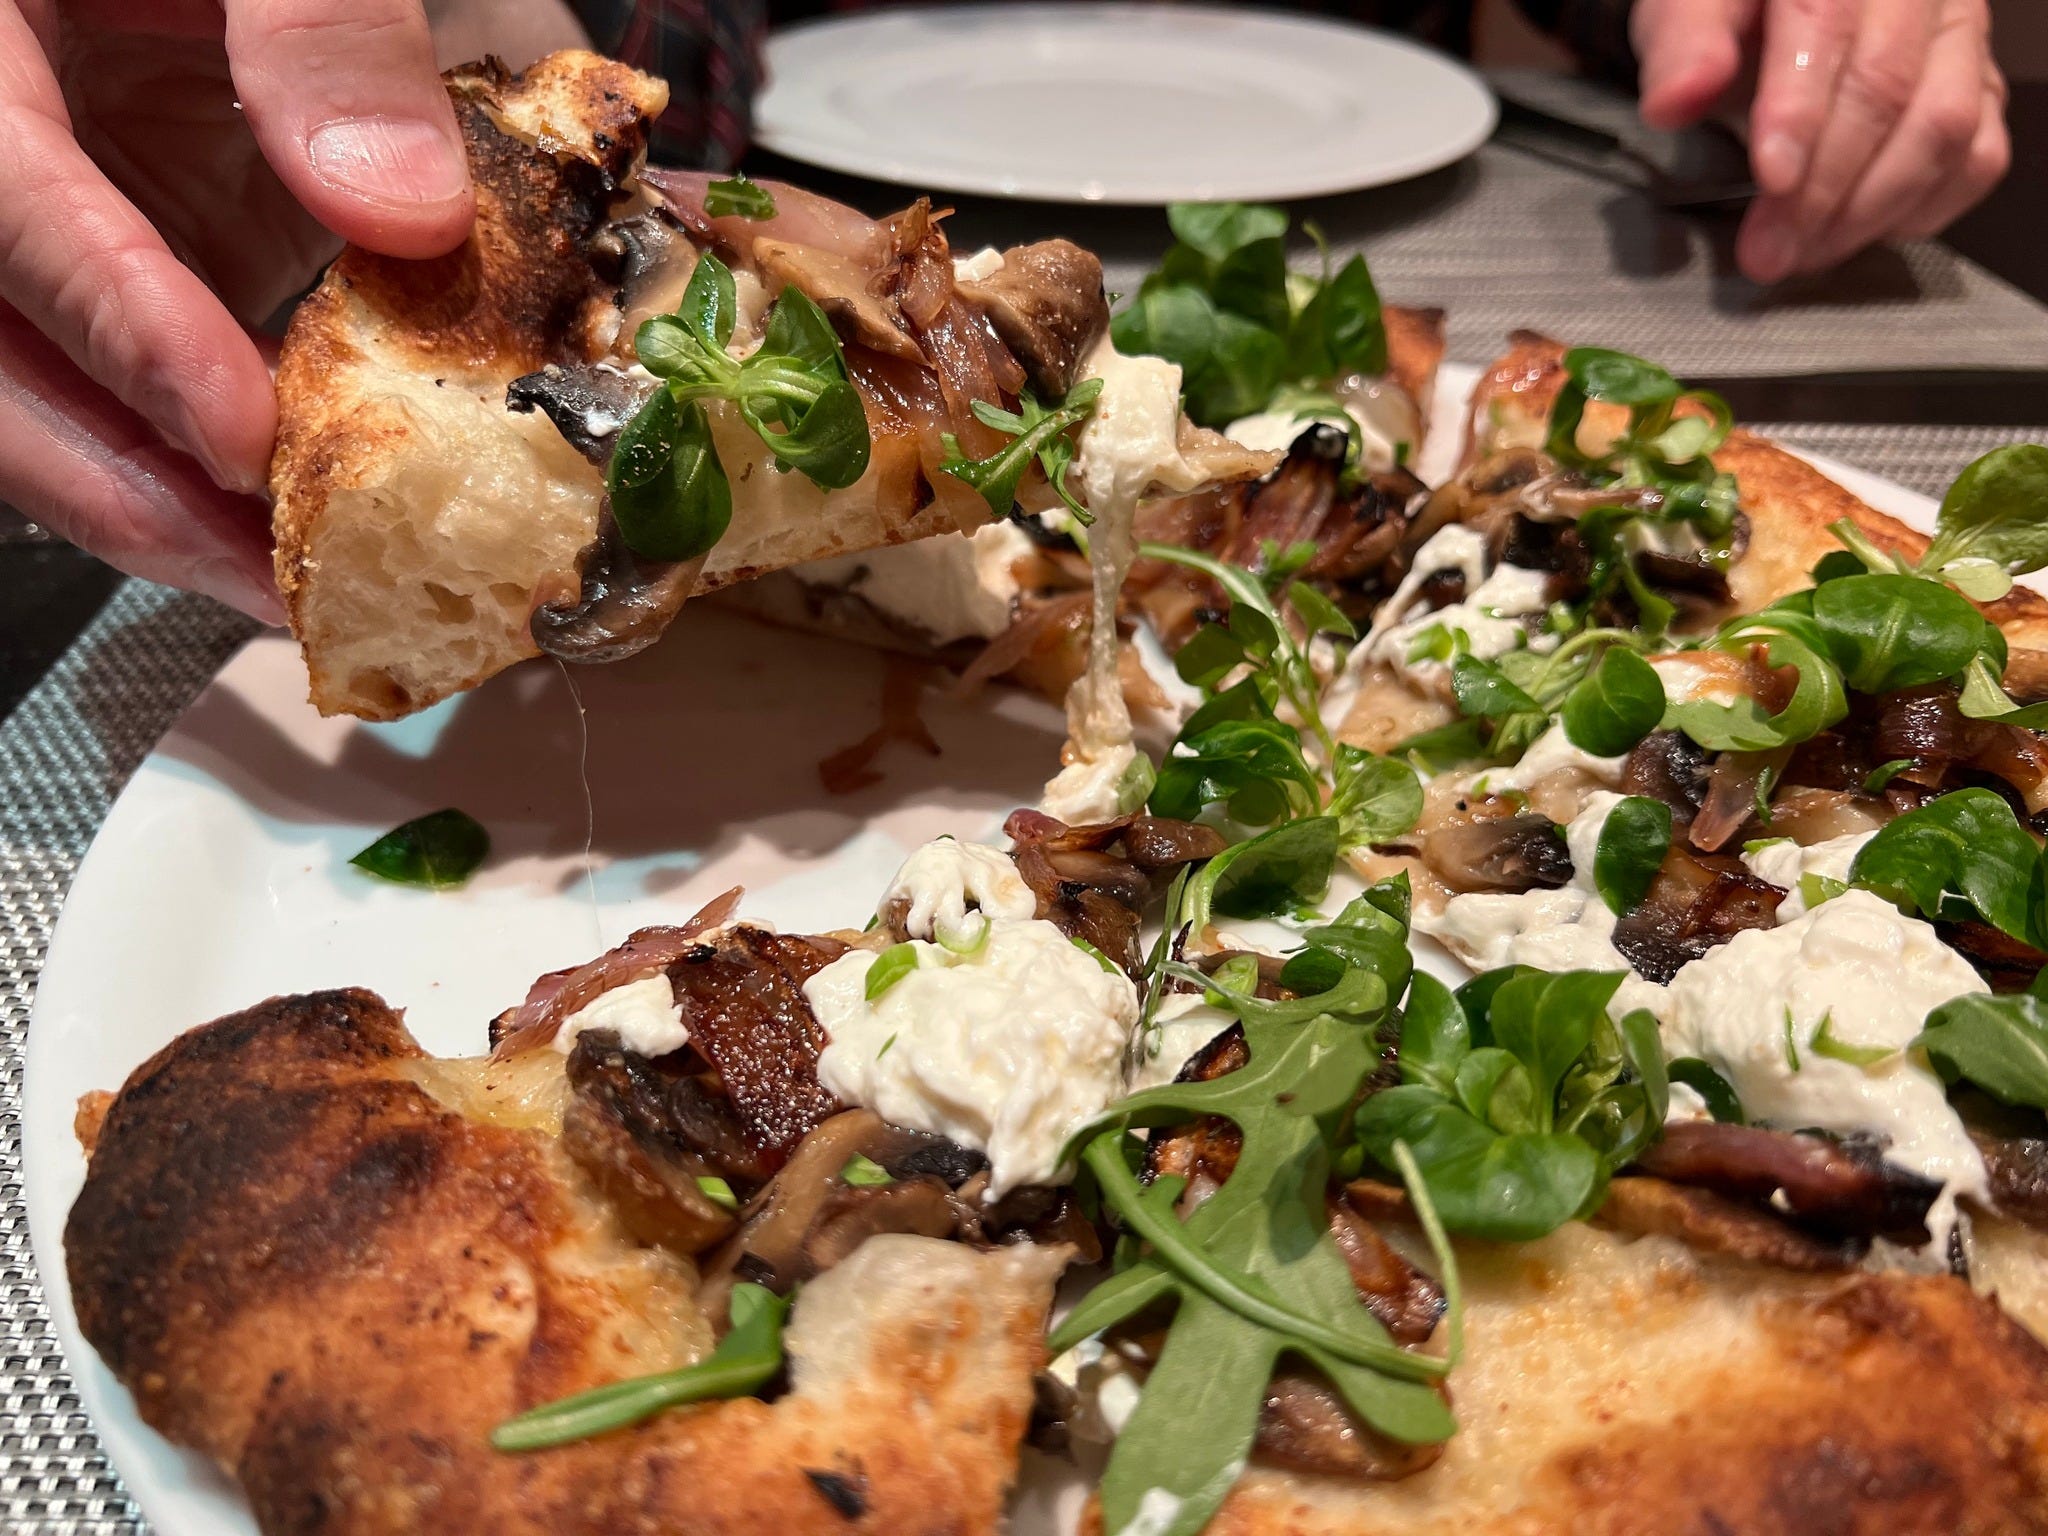
When Michael and I got married, we made a deal – I’d cook, and he’d do the dishes – and we’ve kept it. Although over the years, Michael’s taken to cooking, but only certain things. He makes omelets – and he makes them really well. He cooks anything that needs grilling. He bakes sourdough bread (he’s been tending his starter for a decade). And, a few years ago, he started making pizza.
Pizza night became a thing when Joshua and Linling were living with us during the first frightening wave of Covid. Once a week, Michael would make the dough and stretch it out, and the kids and I would do the toppings. It became a good memory of a topsy-turvy and uncertain time.
We loved Michael’s pizza, but a few months ago, he changed his dough recipe and we now love it even more. We were sent the recipe for the basic, direct Artisan Pizza Dough (no biga, poolish or other starter) from the extraordinary three-volume set, Modernist Pizza. The Modernist Team – the same people who created Modernist Cuisine and Modernist Bread – is led by Francisco Migoya, an exceedingly talented chef and a gifted teacher, and Nathan Myhrvold, once of Microsoft, since perched on top of a creative problem-solving empire that works with obsessive devotion on topics as far-flung as malaria, hurricanes and how to make the best pizza dough.
THE DOUGH
The Modernist recipe for Artisan Pizza Dough is the one that Michael has been using and that we’ve been loving. As with everything that the Modernist team does, the directions are exact and there are notes. Just when you wonder about something, they’re there with an explanation. I love this about their recipes.
Here's how they introduce the recipe for the basic Artisan Pizza Dough:
"Artisan pizza is the result of innovative pizzaioli putting their own stamp on a pizza that is clearly derived from New York pizza (but may include elements of Neapolitan pizza). These now-iconic pizzas were inspired by California cuisine: Wolfgang Puck at Spago in 1982, and Ed LaDou and Alice Waters, who created some of the first artisan pizzas at Chez Panisse in 1974."
And then they direct us to Volume 2 of Modernist Pizza for more on making the dough and gorgeous step-by-step photographs. The images, all shot by Myhrvold, are superb and the instructions meticulous. At $425, the set is more than a splurge, but if you’re obsessed with the world-wide history and how-tos of pizza, you might start a savings account. In the meantime, scroll down for the dough recipe, with notes from the Modernist crew and asides from Michael, who wanted to make sure that I told you that this is a hobby for him, he doesn’t consider himself a pizza master. (Here’s the aside from me: He’s not a pizza master, but he makes delicious “hobby pizza”.)
THE TOPPINGS
For the pizza we had Sunday night, I sautéed some mushrooms in olive oil and seasoned them with salt and pepper. And I sautéed some shallots the same way and then splashed a tiny bit of white balsamic vinegar into the pan and cooked and stirred until it disappeared, a matter of seconds. As you’ll see in the pictures and videos, Michael brushed the dough with olive oil, covered it with grated Parmesan, then scattered over the mushrooms and shallots. When the pizza came out of the oven, we finished it with dollops of burrata and some salad, which I meant to toss with olive oil and either lemon juice or vinegar, but didn’t because I was trying to get a picture of it. It was still so, so good!
Last summer a newsletter reader – oh, how I wish I could remember her name – suggested that I try a corn and ricotta pizza and I did. We loved it! Please, if you’re the reader and you see this, let me know who you are. And THANK YOU.
We're always looking for topping ideas, so if you make this pizza – or any pizza – please post and tell. And tag me on Instagram and Facebook.
Have a slice and have some fun. See you back here Friday –
Some of the links in this post may be affiliate links. As an Amazon Associate, I might earn a little flour-and-sugar money if you make a qualifying purchase after clicking on a link, which I promise to use while creating more stories like this. Thanks for your support.
DIRECT ARTISAN PIZZA DOUGH
Adapted from MODERNIST PIZZA by the Modernist Cuisine team, Nathan Myhrvold & head chef Francisco Migoya
Makes three 14-inch (35-cm) pizzas
Total Time: Active 15–20 minutes / Inactive 6 hours
BEFORE YOU BEGIN
Here are some very good notes from the Modernist Cuisine Team (they're the "we"), with some added commentary from Michael. I recommend reading these notes, then the recipe in its entirety, and then the notes once more before you set to work. This is a project!
We recommend Giusto’s High Performer High Protein Unbleached Flour.
Michael says: I usually use King Arthur Bread Flour because it’s easy for me to get locally. In Paris, I use regular King Arthur Unbleached All-Purpose Flour, which Dorie brings over for testing her recipes.
When you are adding the oil to the mixer, try to pour the oil toward the center of the dough rather than to the outside of the dough. This helps keep it from sloshing around the bowl and makes it easier for the mixer to fully incorporate it into the dough.
We typically use a dough hook to mix all our medium-crust pizza doughs. If the ingredient quantities aren’t large enough for the dough hook to mix them well in a stand mixer, use a paddle attachment initially to mix the ingredients uniformly. Once you have a homogeneous mass (the dough is sticky and wet, and there are no visible clumps or unincorporated water), switch to a hook attachment.
Final mix time at higher speeds may vary from machine to machine.
Michael says: If your flour is not High Protein, that might also increase the time it takes to get to the final stage.
Whatever the model and yield, the goal is to achieve a good mix and full gluten development. Consider our suggested times as guidelines only. Use the windowpane test to help determine the dough’s stage of gluten development.
Michael says: With regular unbleached flour and our old but trusty KitchenAid K5A, it takes almost 30 minutes for the dough to pass the windowpane test.
After preshaping, you can also cold-proof this dough at 39°F for 1–2 days for even better baking and texture results. If you cold-proof the dough, remove the dough from refrigeration 1 1/2–2 hours before shaping so it warms up and is easier to stretch out.
Michael says: If it’s just the two of us, I freeze the extra dough as soon as I form it into balls. To defrost it, I put it in the refrigerator overnight – that way it defrosts evenly – then take it out, bring it to room temperature and carry on (step 13 below).
INGREDIENTS
2 cups (480 grams) water, 70 F/21 C
1 teaspoon instant dry yeast (Michael uses SAF brand)
4 2/3 cups (625 grams) high-gluten bread flour, 13%–14% protein (see notes)
1 tablespoon + 1/4 teaspoon (13 grams) diastatic malt powder (you can order this, but Michael says that, in a pinch, you can sub an equal amount of sugar)
2 1/4 teaspoons (12.5 grams) fine salt
1 tablespoon + 1 1/4 teaspoons (20 grams) extra-virgin olive oil
MAKING THE DOUGH
1) Combine the water and yeast in the mixer’s bowl and whisk to dissolve the yeast.
2) Add the flour and malt powder, and mix on low speed to a shaggy mass, about 1 minute. Use the dough hook here; see notes.
3) Mix on medium speed to low gluten development, about 5 minutes.
4) Add the salt and mix on medium speed until it is fully incorporated, about 1 minute.
5) Add the oil with the machine running on medium speed and mix the dough until it reaches full gluten development, about 11 minutes. This can take longer; see notes.
6) Perform the windowpane test to assess gluten development. Take a portion of dough in your hands and stretch it: the more the dough can stretch without tearing, the more the gluten has developed. The dough will hold the window for at least 8–10 seconds and it can be stretched to the point that it is nearly see-through when it has reached full gluten development.
7) Transfer the dough to a lightly floured worktable. Cover well with plastic wrap.
8) Bench rest for 20 minutes.
9) Divide the dough into three even-sized pieces.
Michael says: I divide the dough into 4 pieces for two reasons: 1) we’re often only two people and a 14-inch pizza is too much for us; and 2) in Paris, our oven is too small to easily accommodate a 14-incher.
10) To pre-shape, place each cut square of dough smooth side down. Fold the top one-third of the dough toward the middle, and then fold the bottom one-third toward the middle, overlapping the ends slightly to form an envelope.
11) Rotate the dough 90° and roll the dough up lengthwise.
12) Gently round the dough with both hands, leaving the seam side down, to create a tight, round package.
13) If necessary, pinch the seam shut. This is important to prevent it from ripping when you shape it.
14) Repeat steps 10–13 with the two remaining pieces of dough (the following video shows these pre-shaping steps).
15) Place on a sheet pan. Spray a very light mist of water over the dough.
16) Cover the dough well with plastic wrap.
17) Proof the dough, covered, for 4 1/2–5 1/2 hours at 70°F.
18) Test for proof using the fingertip test. Gently press the exposed surface of the dough for 2 seconds; the pressure should leave a small dent in the dough; it will slowly spring back, but the indentation should remain clearly visible after 1–2 seconds.
19) Shape, assemble, and bake the pizza – either follow your own recipe or keep scrolling.
HOW TO SHAPE AND BAKE A PIZZA
Adapted from MODERNIST PIZZA by the Modernist Cuisine team, Nathan Myhrvold & head chef Francisco Migoya
1) Preheat the oven to 550°F for at least 30 minutes with a baking steel or baking stone in the top third of the oven. Some home ovens will not reach 550°F (in some cases 525°F is the highest they will get). If this is the case, increase the baking time by 1–2 minutes. If you prefer a darker crust, simply bake the pizza for longer, but check it every 30 seconds after the recommended time to ensure it doesn’t burn.
Michael says: In our Paris oven, where this pizza was baked, we use “top and bottom convection” and put the rack in the center of the oven.
2) Generously flour your worktable.
3) Lift the pizza dough from the sheet pan using a narrow, sharp bench knife.
4) Place it on the worktable, seam side up and dust the top with more flour.
5) Press down on the dough with your fingers, leaving a 0.5–1 inch border. You will not need your palms or thumbs yet. Your fingers will arch naturally, so don’t make them too stiff.
6) Rotate the dough 180° and repeat step 5. The point is to create an even disc that is flat in the center and has an even rim.
7) Flip the dough over and flatten the center again, pushing the dough in an outward motion to extend the central part of the dough. It should be 6–8 inches in diameter.
8) Place the dough disc on the backs of your hands so that the smooth side is in contact with your hands.
9) Stretch your hands apart gently, rotating the dough 90° as you stretch farther and farther. Keep stretching the dough until it reaches 14 inches in diameter.
10) Distribute the toppings that need to be baked evenly to the rim.
Michael says: I do this when the dough is on the peel (I dust the peel with semolina) – I think it’s easier to move the loaded pizza around this way.
11) Slide the dough onto a peel or slide the peel at about a 5° angle under the dough, using quick, jerking back-and-forth motions, until it is completely on the peel. (See Michael’s note to Step 10)
12) Load onto the baking steel or baking stone in the oven with a quick pull-away motion.
13) Bake for 8–10 minutes, rotating 180° halfway through baking.
Michael says: Baking time really depends on the oven. Start checking at 4 minutes.
14) Check the doneness of the bottom of the pizza.
15) Remove the pizza and place on a serving tray. Cut into 6–8 triangles.
16) Distribute whatever other toppings you’re using over the pizza. For example, if you’ve got soft, fresh cheese, cooked meats, like prosciutto, or salad, like arugula, you’d put these on the individual slices of pizza now.
Michael says: Putting fresh toppings on the pizza when it comes out of the oven is really the way to go. The contrast of textures is terrific and fresh, uncooked ingredients also bring brightness. Cutting the slices and then topping them individually is also a great idea, but we don’t do that.
I say: I’m loving the idea of cutting the slices, setting out a few toppings and seasonings and having everyone make their own pizza. Party time!
💥 New to xoxoDorie? You can find an archive of past newsletters here.
📬 Subscribe to find me in your inbox
👨👩👧👦 Join BAKE AND TELL, our very own clubhouse so we can bake — and share— together. It has great recipes, riffable ideas & so much to learn from each other.
👋 Say hello and share what you're making on Facebook and Instagram.
📚 You can find more recipes in my latest book BAKING WITH DORIE.